DIY Zinc Plating
- Motobabble
Anyone who does their own restorations is familiar with the dreaded “4 P’s” of restoration – Painting, Polishing, Powdercoating, and Plating. Pretty scary stuff with lots of insanely expensive equipment and wizarding skills required, right? So we all pack and ship irreplaceable parts or assemblies out to shops in other States – and sometimes other countries to get one or more of the 4P’s done – HOPING to get everything back and hoping it was worth the large sum of money that we sent.
Like many, I have taught myself to muddle through the painting and the polishing, but during my 35 years of doing vintage bike restorations, the Plating ‘P’ has always eluded (terrified) me. Specifically, zinc or cadmium plating. While most plating types are decorative in nature, zinc and cadmium are somewhat unique in being sacrificial coatings that were originally applied to the new steel or pot metal parts to prevent rust and corrosion. Over many years of exposure, this coating wears away and the parts become rusty or dull, dark gray.
There are literally dozens of expensive or unobtainable steel and pot metal parts on any race- or show-restoration that need a new shiny silver protective coating of zinc or a matte coating of cad plating. Wheel spacers, axle adjusters, sprockets, trim rings, engine plates, petcocks, carb bodies, etc. For me, the biggest problem has always been the many bolts, nuts, screws, and spacers that are specific to that make or model bike – and which just are not available any more. You could obviously make do if Home Depot or Lowe’s happens to have the correct size nuts and bolts, but the cast-in data on the head of the hardware store bolts will stick out on your restoration like an amateurish sore thumb. Plus, most 8mm hardware store bolts and nuts have a 13mm head – something that is just not used on a proper Japanese bike restoration.
Like most of you, I had always boxed up all the parts and hardware and sent them off to a commercial plating company. But then there’s the cost, the time involved, and the chance of irreplaceable small parts being lost. Besides, this is a DIY column, right? As it turns out, doing your own zinc or “cad” plating is not that difficult or expensive – it’s even (dare I say it?) fun.
For years I have tried to copy the many “simple-cheap-internet-video-DIY-with-stuff-you-have-at-home” plating setups. I mean, I see guys on YouTube mixing up witch’s brew solutions, hooking up a battery charger as a power source and supposedly getting professional results. Not me. I would just end up with crusty, gray hardware that then had to be cleaned up – and sent out to a plating company! But about five years ago, I finally bit the bullet and put together a zinc plating setup based around a commercially available kit that works flawlessly with little or no hassle. It’s a setup that anyone can duplicate for under $500 and get exceptional results.
Now for the disclaimers: First, cadmium is a toxic metal and NOT suitable for the home plating shop. So the “cadmium” in this article is simply zinc, plated on as a matte finish to give the dull gray cadmium look that was original on some hardware – especially on vintage British bikes. Second, there is a phenomenon called “hydrogen embrittlement” which comes from hydrogen bubbles being forced into the steel when plating. It can cause hardened steel items like springs, Belleville washers, or footpeg pins to become brittle and break when enough force is applied. If this a concern to you, this embrittlement can be eliminated by simply placing any part you might be concerned with in a 375-degree oven for 4 hours within one hour of plating. Finally, although most of the solutions we will use are pretty tame, chromates are toxic and muriatic acid is obviously dangerous. Use rubber gloves, goggles, and a rubber apron when working with these chemicals.
Okay, that out of the way, here’s exactly what I use to do zinc and cadmium (look) plating:
- Caswell Zinc/Copy Cad® kit. This is the key to success. It includes plating tanks & lids, zinc anodes, Copy Cad®/Zinc Part A & B, zinc brightener, SP Degreaser (makes 4 gals), aquarium air pump, abrasive nylon wheel, and the excellent Caswell Plating Manual. Available in sizes from 1.5 gallons to 15 gallons, I have the 3-gallon setup. The size of parts you are plating determines how large a plating kit you need. The 3-gal kit is a bit over $300 and is all you need for most motorcycle-sized parts.
- Constant Current Power Supply. These can be found on eBay/Amazon for about $50. I have a 5-amp unit, which is fine for my little 3-gallon setup. MUST be constant current capable so you can adjust amperage up to the voltage you need.
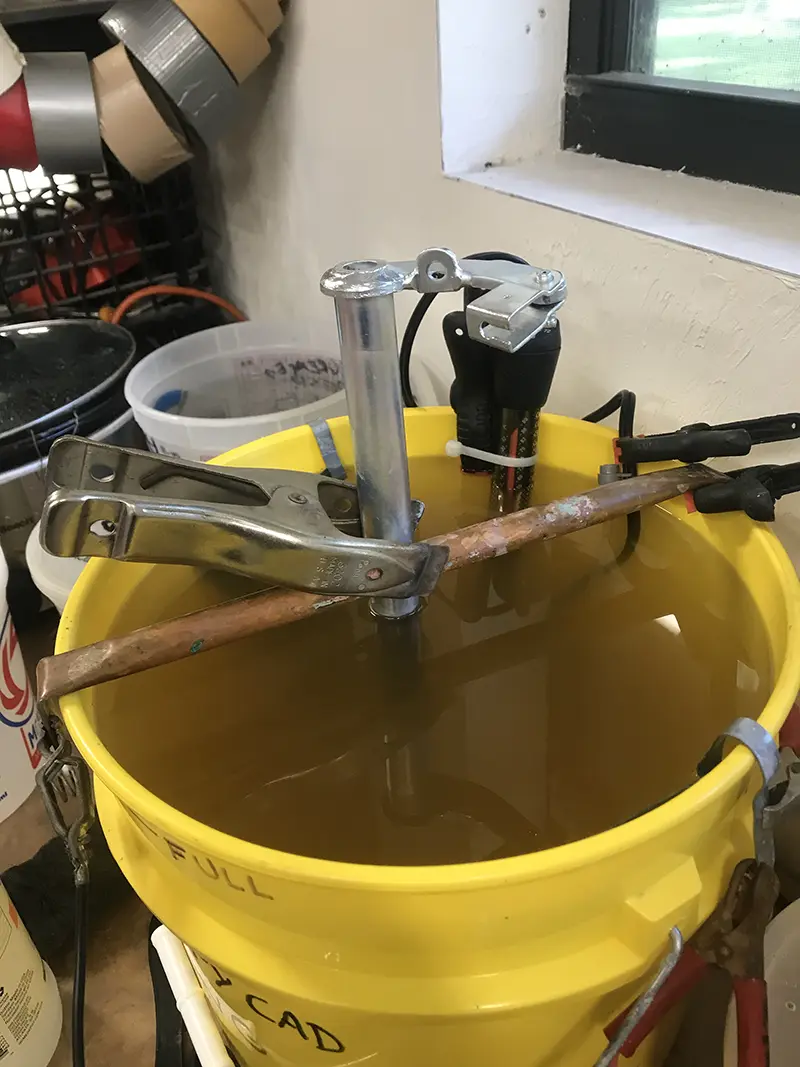
- About a 2’ length of ½” copper pipe (available at Lowe’s/HD for about ten bucks) that will be cut and modified for use as a “hanging bar” in the plating tank.
- Caswell Blue Chromate Solution ($23) and Caswell Yellow Chromate Solution ($35).
- Aquarium heater for the plating tank. The inexpensive unit I bought adjusts up to 95 degrees. It actually gets the tank to 100 degrees after a few hours. Any temp from 90 to 110 is fine. I think it was about $20 at an aquarium store. For faster heating, splurge and buy TWO of the cheap heaters.
- 7-qt, oval crock pot to keep the degreaser solution at around 140 degrees. Hot degreaser is critical to getting ALL the oil and grease off your parts. $25 at Wal-Mart.
- Six 2 ½ or 5 quart plastic buckets with snap on lids from the paint department at your local Lowe’s or HD. These are for rinse water, chromate dips, and acid dip. About $12.
- Sets of cheap, plastic stirring utensils, measuring spoons and cups. $3 at Wal Mart.
- Egg timer. $5
- Spray bottle for distilled water rinsing. $2
- You will also need about 7 gallons of distilled water and a gallon of Muriatic pool acid (Lowe’s, HD.)
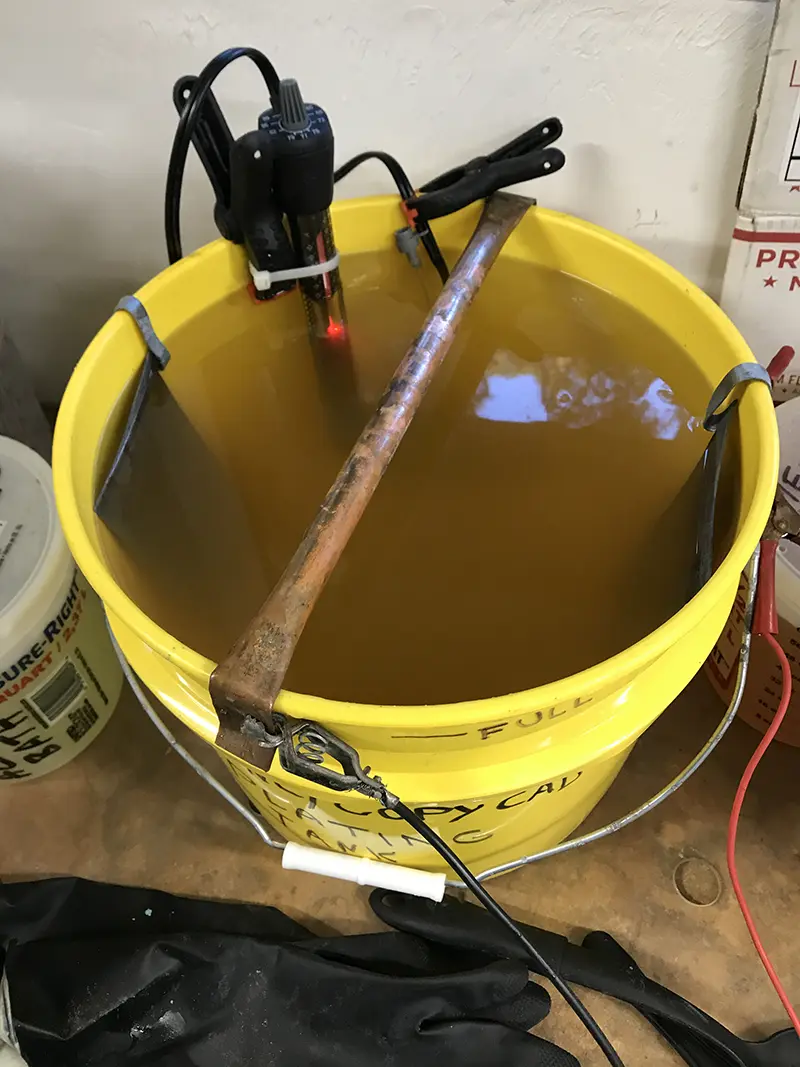
I set up a small dedicated area in my shop for plating using an inexpensive little workbench with a few storage drawers and a layer of 1/8” Lexan on top to protect the pressboard top from the chemicals. The process for plating is outlined extremely well in the Caswell Plating Manual. However, I have found several simple workarounds for the more complex parts of their process.
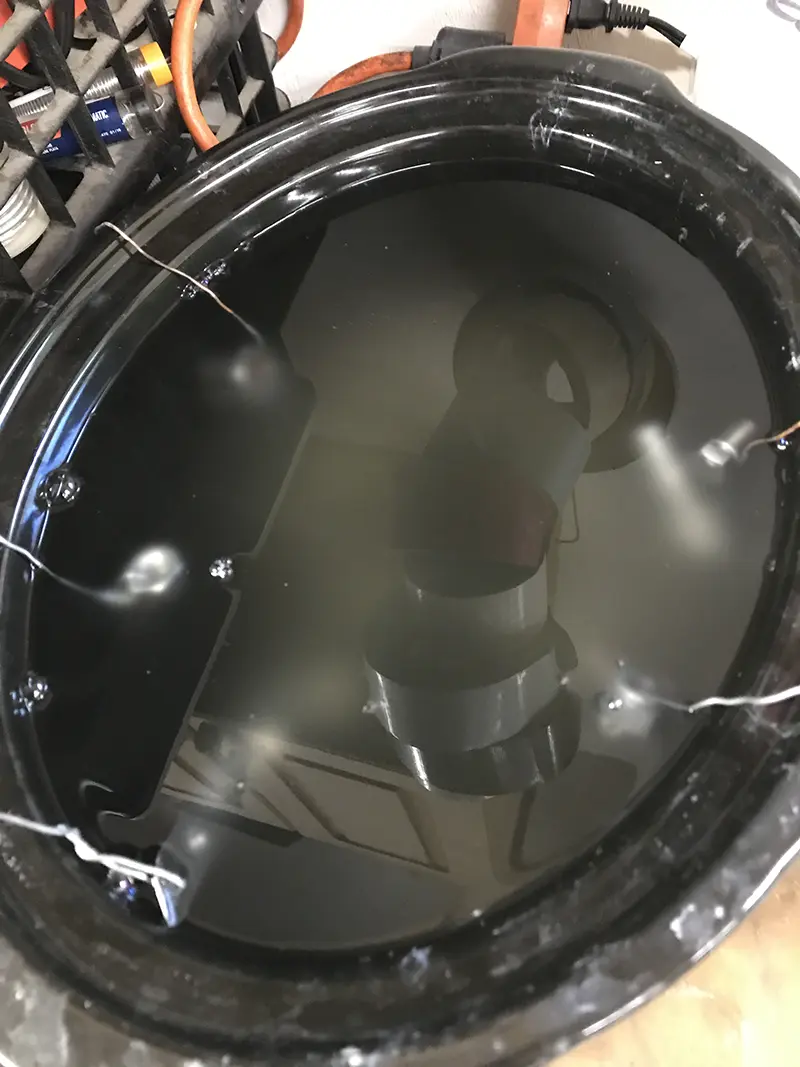
Set up your plating tank, anodes and connecting wires as per the instructions. I use those cheap plastic spring clamps to keep my aquarium pump (for tank circulation) and heater in place on the tank wall. It takes a couple hours to bring the plating bath up to temp.
The crock pot heats up really fast. Use a meat thermometer to check the temp and don’t let it get too high. You really want it right around 140 degrees. Once up to temp, turn it all the way down to “warm” and it will be fine all day.
The muriatic pool acid you get from HD or Lowe’s is already a 30% solution. So mix it with enough distilled water to get to a 5% total mix. Use serious caution here.
My setup includes a distilled water rinse bucket for every step. You cannot rinse too much. I have a post-degreaser rinse, a post-acid dip rinse, and a post-plating rinse. I change out these rinses pretty much every time I fire up the system. Distilled water is cheap – contaminated plating chemicals are not. You also want to keep a full spray bottle of distilled water to rinse the part AFTER it is pulled from each rinse bucket.
Like all finishes, the best results come from the best surface prep. Garbage in – garbage out, as they say. Only painted or seriously rusted components get put through my glass bead cabinet. If you are after the typical shiny zinc finish, then all parts, bead blasted or not, get the wire wheel treatment to remove oxidation, old zinc plating, rust, and heavy dirt/grease deposits. You want the part to look like it doesn’t need plating. Do yourself a favor and put a piece of carpet or a towel on the floor under your wire wheel to give yourself a fighting chance of finding that tiny bolt when it is snatched out of your hands at the speed of light by the wire wheel. If you are going for the matte cad finish, just bead blast and skip the wire wheel. I have recently discovered PrymeMX’s “Fine Cleaning Wheels” for bench grinder or die grinder. Using these after wire wheeling will make your parts look almost like chrome and give the very best zinc-plated finish.
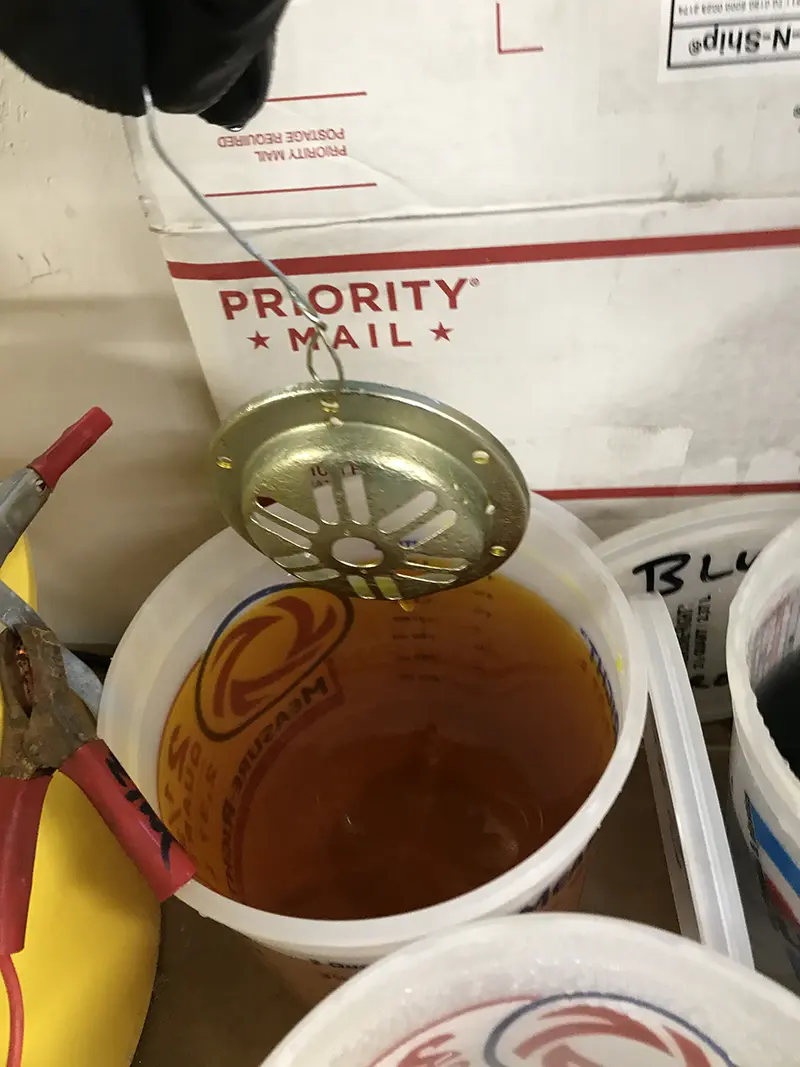
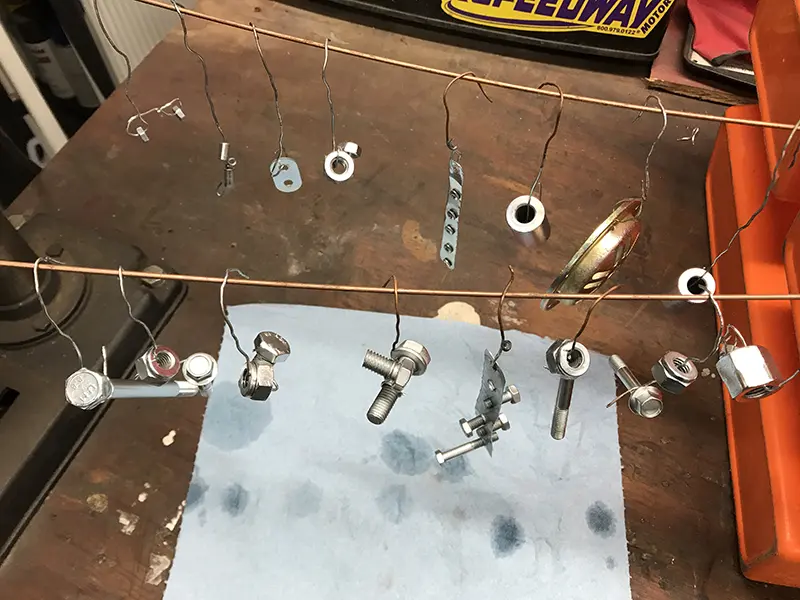
Once prepped, I hang the parts with 12” lengths of bare copper or brass wire (available from Amazon.) Groups of 5mm and 6mm bolts are screwed into strips of thin copper and hung with a short length of wire. Wires and bolt strips can be used over and over again. Put a group of your wired parts into the hot degreaser to soak for five or ten minutes. Then pull them out, immediately dip them into the degreaser rinse bucket and spray rinse again over the bucket. For all steel parts, I then dip them in the acid solution for about 5-10 seconds. They will likely fizz like mad, but this will get most of the remaining rust, dirt and grease off the parts.
Spray off over the acid tank and then dip in the acid rinse bucket. Spray off AGAIN before hanging them in the plating tank. Repeat all the above with the other wired parts. Once the copper bar across your plating tank has three or four wired parts hanging, it’s time to set the amperage and begin actual plating.
Caswell has all kinds of formulas and spreadsheets and methods for figuring the total plating area. Let me tell you, it’s VERY complicated and time consuming trying to figure the total surface area of every nut, bolt and irregular part you are trying to plate. It’s definitely the most daunting part of the process. I had pages of calculations and plated a whole bunch of parts before I figured out that all you have to do is start dialing up the amperage with the “coarse” knob until the voltage meter is showing 0.6 volts. Then dial back slowly until it shows 0.5 volts. Finally, adjust with the fine knob back up until you are just over .6 again. Let it plate for 15 minutes on nuts and bolts and maybe 20 minutes for larger parts. That’s it. Simple.
You can pull the parts out of the plating bath during the process to check on how they look. Plating too long won’t hurt anything – it will just deposit more zinc on your part. Once you are satisfied with the look, pull out of the plating tank and rinse in the post-plating rinse bucket. Then spray off again and decide whether you are going with blue chromate (normal) or the iridescent yellow chromate.
Zinc reacts immediately with air to form a gray/whitish oxidation layer. The chromates remove this and add another layer of protection to the part and the zinc. With most parts where you are going for a “clear” look (with some slight iridescence), dip the rinsed part in the blue chromate solution and swirl around for 40 seconds. Pull out of the solution, rinse well with your spray bottle (over the chromate tank) and hang up to dry. You can speed the drying process with a low temp hair dryer – but not a heat gun. I usually just let it hang overnight.
The iridescent yellow chromate can be a really good look on some parts, but moderation is key here. The only difference from the blue chromate process is that you only dip for 10-15 seconds. Any longer and the part gets REALLY bronze-colored.
You’ll probably want to plate some parts that are too long for the depth of your plating tank. Parts like brake rods, axles, fender brackets, etc., can simply be clamped vertically right to your copper hang bar and plated half at a time. After plating one half, turn the part over and do the same for the other half with just a bit of overlap. Dipping in chromate will pretty much erase the overlap line. Also, if a part cannot be separated from a rubber or plastic component, skip the acid dip, but the rest of the plating process won’t bother the plastic or rubber. Just make sure the metal part is in contact with the copper wire when plating.
Once you finish plating for the day, be sure to put lids on all your rinses, acids, and chromates, turn off the crock pot, put its lid on, and clean your utensils. You should remove everything from the plating tank and set its lid on too. Clean and dry off the heater (once it has cooled) and rinse the aquarium pump thoroughly. The zinc anodes should be rinsed in your shop sink, dried off completely and set aside for the next time you plate (they last a LONG time.)
Finally, Caswell has excellent technical help if you run into issues, along with a very helpful online user forum. So if you’re looking for your next shop project, why not give zinc plating a try? I think you’ll find it to be a very satisfying addition to your arsenal of restoration skills. Then, once you’ve mastered zinc plating, you can move on to Caswell’s Flash Copper and CopyChrome plating kit so you can do your own chrome plating on smaller parts.