by Eric Kraft
When talking restorations, the subject of wheels always comes up. Beautifully restored wheels are one of the most visible parts of any restoration, and nothing screams “amateur hour” like gray, corroded spokes on an otherwise shiny, beautiful bike. But the fact is, many new restorers are hesitant to do wheel relacing on their own. It seems so complicated and daunting, but it’s really not. I suggest starting out with a bike that has full-width brake hubs. These are the very easiest to re-lace since you only have two different bend/length spokes, and the angles are the same for each side of the wheel. Once you understand the techniques involved, you can move on to conical hubs. Be sure to take lots of detailed pictures before you start so that you have good reference material—especially when you start working with conical hubs. In that case, you could have four different length/bend spokes, and the drilled holes in the rim will have different angles side-to-side, so you need to know the rim orientation in relation to the hub.
Once you are satisfied that you have enough photo documentation, start removing the spokes. I prefer to unscrew each spoke and remove it the way it was installed, but if the spokes are frozen or rusted to the nipples, that may not be an option. In this case, you will probably have to use bolt cutters. Whichever way you go, try to release the tension on the rim evenly on each spoke. This will help prevent warping as you disassemble. You will likely be ordering custom spokes, so be sure to save one complete, uncut example of each spoke type with its nipple. Label your samples with masking tape as inner or outer and hub or brake side so you can mail to your spoke supplier to duplicate. Now is a good time to clean, maybe bead blast, and polish or paint the hubs. It’s also a great time to replace wheel bearings if there is any grittiness at all when you spin the bearing with your finger. If the rims need attention, take care of that now too—especially paying attention to wire-wheeling the rust off the inside of the rim. If you’re going to all the trouble of rebuilding your wheels, do yourself a favor and re-lace with quality stainless spokes and nipples. These will ALWAYS look great—even after many years. In the U.S., my “go-to” stainless spoke supplier is Buchanan’s Spoke and Rim, Inc. in Azusa, California. Expect to pay about $150 per wheel for these top-quality custom spokes.
Photo 2
Once you have your shiny new new spokes, the hubs are polished/painted, and your rims are looking new, lay the parts out. For the sake of simplicity, we are going to assume you are lacing a standard, 36-hole rim with full-width hub and only two different bend/types of spokes. For the most part, the process will be the same for conical hubs, but you could have up to four different length/bend spoke types. Separate the spokes into 18 “inners” and 18 “outers.” Inner spokes are the ones where the knob at the end of the spoke is on the outside of the hub flange. These are the spokes you push through from the outside of the hub. They will have less of a head angle bend than the outer spokes. Start with the inners and push them all through on both sides of the hub. Skip a hole with every spoke for the outers, later. Now lay the hub down on your work surface (doesn’t matter which side is up) and check your reference photos to see which way the spokes are angled on each side of the hub (clockwise, or counter). Arrange the spokes roughly like a pinwheel in the proper directions (photo 2). It doesn’t matter on a full-width hub which way the rim is oriented, but I’m a little OCD, so I still check my reference photos, and have it set the same way as original (i.e., letters on rim right side up when hub is brake side up). You will often have wear patterns (witness marks) on the outside of the hub which help show which holes originally held outer spokes – and which direction these spokes went. If not, when disassembling the wheel, it might be helpful to make a mark along an outer spoke on each side of the hub. As I said, if you have conical hubs, there can be three or four different spoke types. Make sure you know which is which. You might even have all “inner” spokes on the narrow, “conical” side of the hub. Either way, the lacing process is much the same—all the inners first—and then the outers. The drilled holes in the rim are angled either towards the left or the right side of the hub. Further, they are angled for either clockwise, or counterclockwise spokes. So, there are four different angles to the rim holes. (Not all spoke hole angles are the same. The spoke angle for a rim laced to a small diameter disc brake hub is not the same as a rim drilled for a 200mm drum brake hub. This is important when purchasing new, replacement, aftermarket aluminum rims.) Start with one of the inner spokes you have placed into the top of the hub. We’re assuming the hub and rim are lying on your build table with the inner spokes on each side of the hub pinwheeled out in the proper directions. It should be readily apparent which rim hole is angled up and at the proper orientation toward your inner spokes on the top of the hub. Start one of your spokes in one of these holes. Just push through the hole and put a nipple on a few threads. Be sure to use a few drops of no-seize lubricant on the threads. Buchanan’s supplies a bottle of this with every spoke set. Skip three holes and start the next spoke on that same side of the hub. Continue around until all nine spokes are started (photo 3). Now you can start the inner spokes on the other side of the hub, but first, hold the hub firmly and rotate the rim in the direction that pulls all the slop out of the nine spokes. You don’t have to flip the wheel over. The proper hole should be apparent, as you will only be able to properly reach one hole with the correct angle (photo 4).
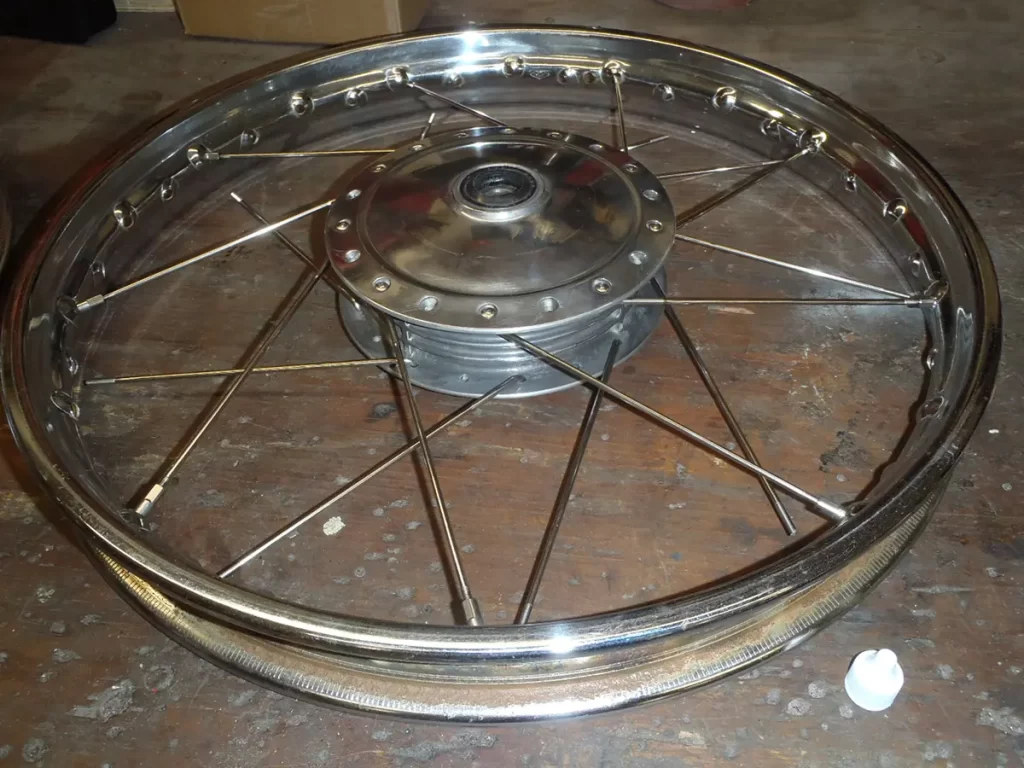
Photo 3
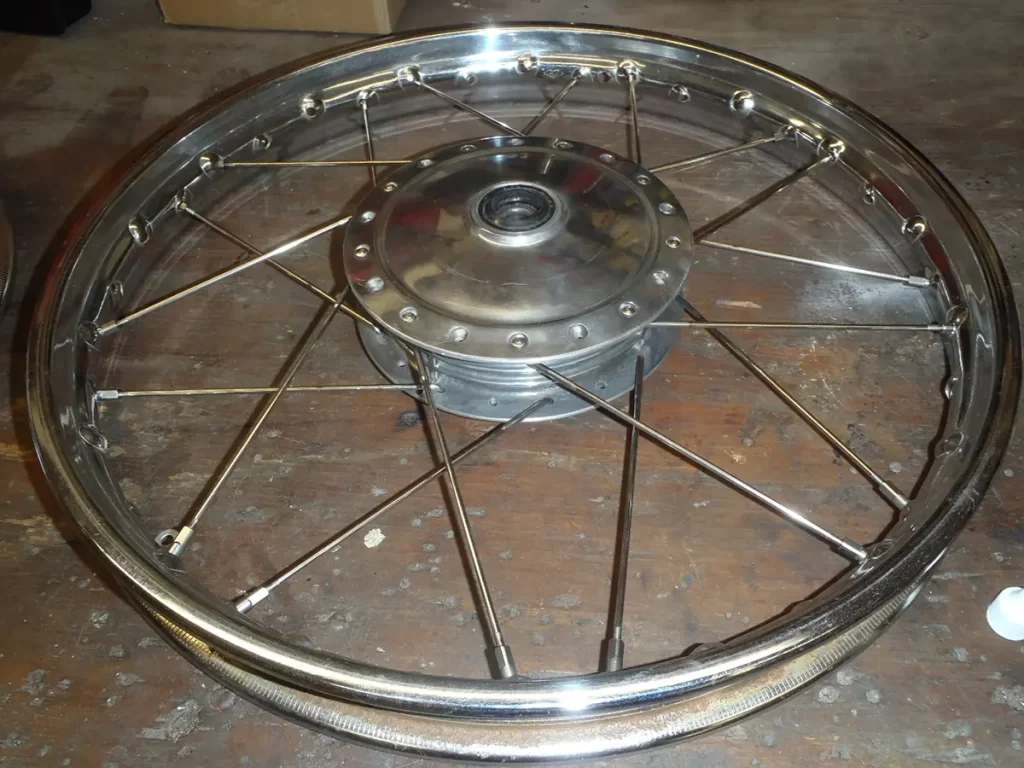
Photo 4
Once all inner spokes have been started, you can start inserting the outer spokes. Since they push through from the inside of the hub and lay OVER the existing inner spokes, they are very easy to install. Obviously, they rotate in the opposite direction of the inners. Pull your wheel assembly over the edge of your workbench to make it easier to push the spoke up through from the bottom (photo 5). Again, there should only be one correctly angled hole that the spoke will reach (photo 6).
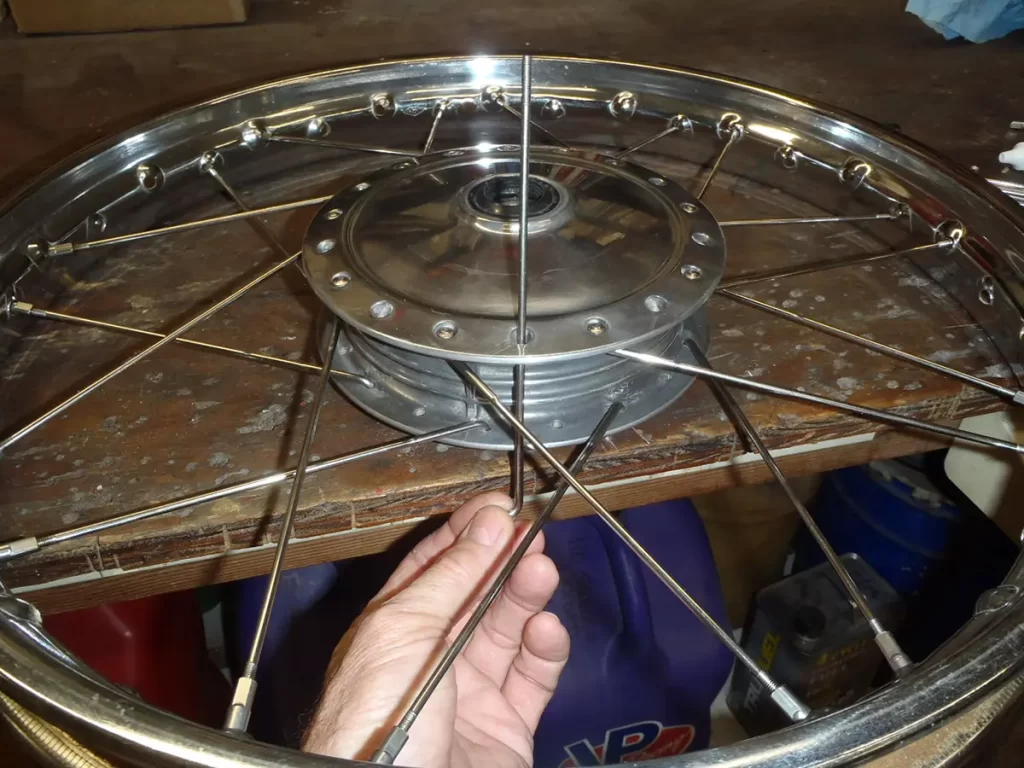
Photo 5
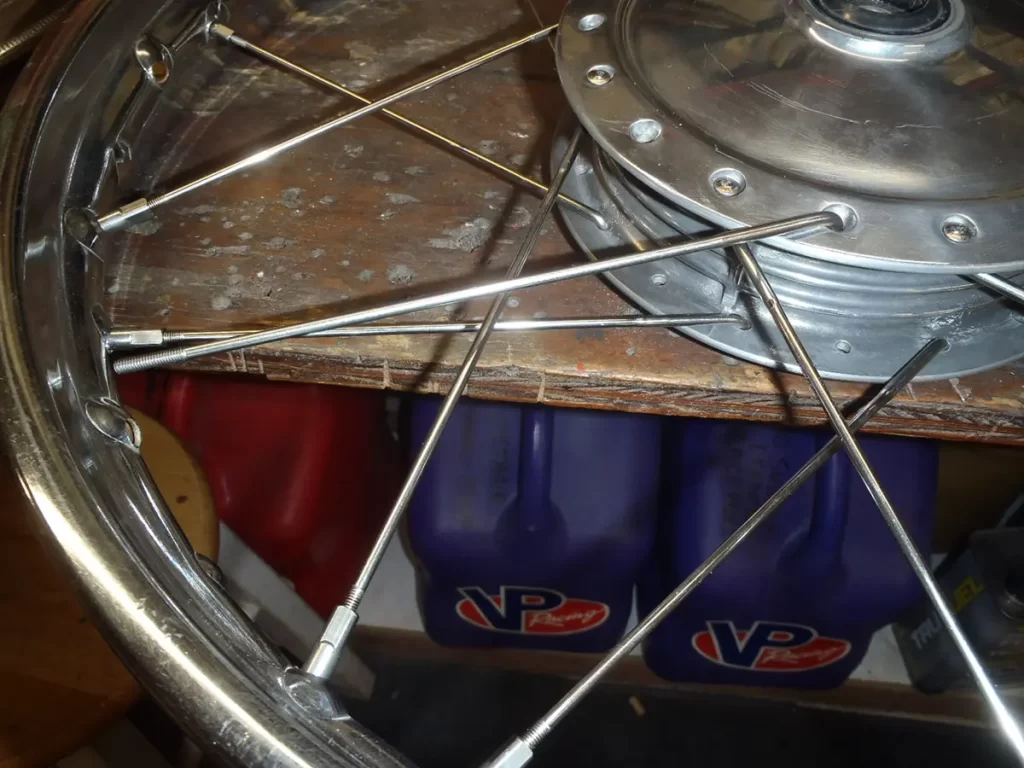
Photo 6
Do all the spokes on one side of the hub (photo 7), and then flip the assembly over and start on the other side (photo 8). This is very straightforward on full-width drum assemblies. But on a conical hub you may have to remove the nipple from a spoke or two to insert each of this last set of nine outer spokes. Just reattach as soon as you have pushed the new spoke through, and it is in place. There is another method for installing the outside spokes. If you have a wheel truing stand, mount the wheel in the stand, and then install the outside spokes. This makes it easier to insert the spokes and access the nipple holes.
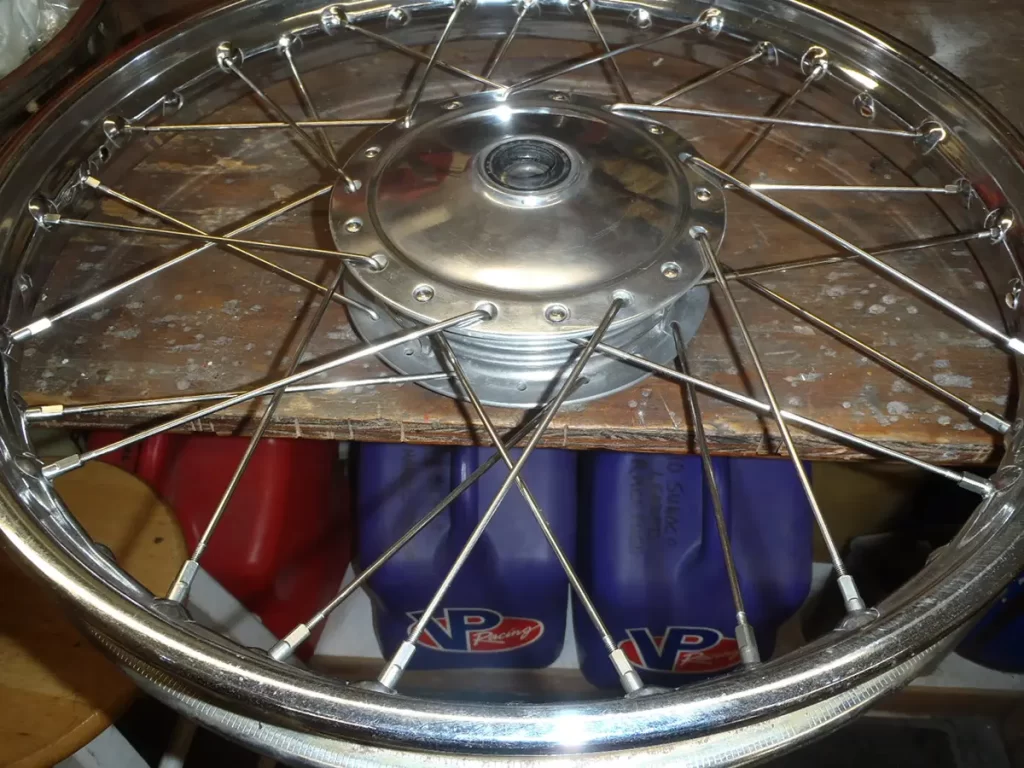
Photo 7
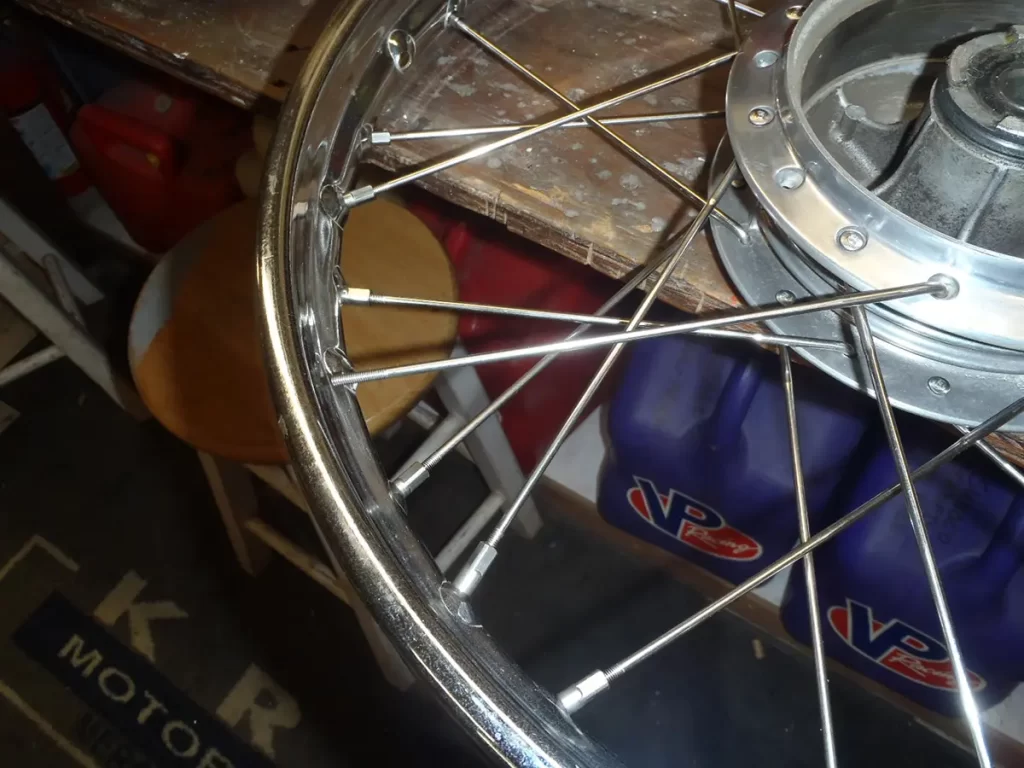
Photo 8
Now that all spokes are installed loosely (photo 9), start twisting them with your fingers a few turns at a time and going around and around the rim until there is slightly less than a quarter inch of thread showing above the nipples (photo 10.) Next, go around the rim and twist each spoke until there are no threads showing. At this point, you simply continue going around and around a turn or two each, until all spokes are finger tight. This process will result in a rim with little or no hop (out-of-roundness) to deal with when you go to the truing phase. There will be some spokes that start to tighten before others, but the majority of the spokes should be snug. Go around the rim, find the spokes that are not yet snug, and finger tighten them. It may be helpful during this process, if you are doing this on the top of a bench, to block each side of the rim up a little so that it is approximately centered in the hub.
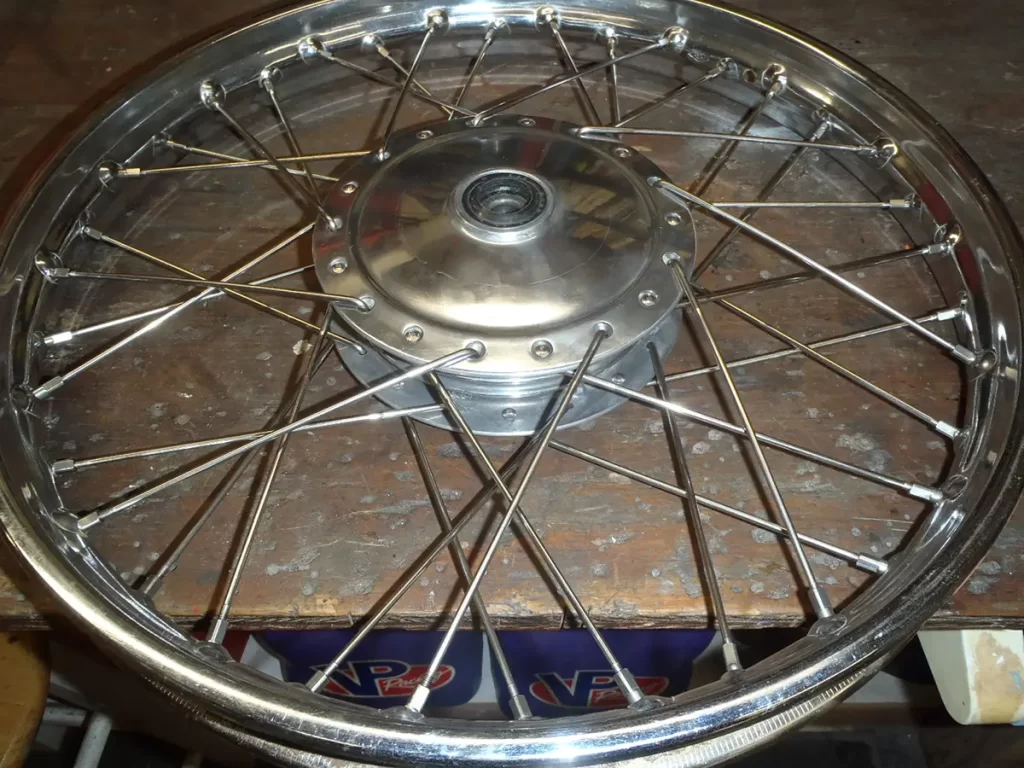
Photo 9
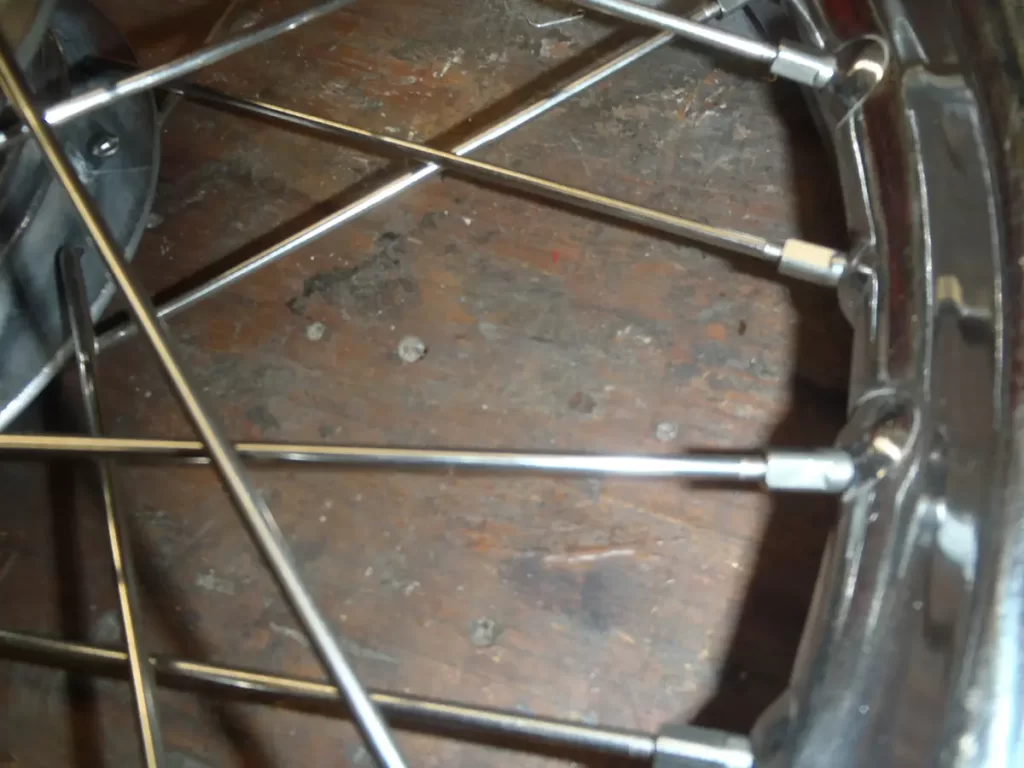
Photo 10
With everything finger tight, continue to tighten the spokes a half or quarter turn at a time with the proper size spoke wrench and continue going around and around the rim. Now is the time to check the rim for axial runout or wobble before the spokes start to tighten. It will be difficult to correct this if the spokes are too tight. Continue going around the rim a half-turn or so at a time until you judge all spokes are almost tight enough. If you don’t happen to have a truing stand, simply put your axle in a vise, slide the wheel onto the axle and spin it (photo 11). If your wheel was true before, or if you used a new rim, and assuming you were careful to evenly tighten the spokes, it will probably be very close to true now. If not, you must start removing the wobble (axial runout) and hop. Wheel truing stands have adjustable arms/pointers that are used to gauge runout. If you are truing a wheel mounted on the axle, you can make your own by clamping anything close to the edge of the rim. You can also use a permanent marker held close to the rim to mark the wobble areas. This provides a visual reference so you can determine the range of the area that requires adjustment. Minor wobble can be corrected by tightening the spokes on only one side, but excessive wobble may require loosening the spokes on one side before tightening the opposite side. The same is true for hop. Once satisfied that the wheel is straight enough, go around the rim a few times to get all the spokes to what feels like proper tension. You will have to use your arm like a torque wrench and “feel” for even tension – it’s not as hard as it sounds. For the typical dirt bike, the wheel will be plenty true enough. For a street or road racing bike, you may have to enlist the aid of an expert to get it perfectly true. The ideal maximum axial and radial runout for street or road race wheels is 0.5mm. It’s not unusual for spokes to ‘bed in’ or ‘take a set’ on freshly laced aluminum wheels, which means they may tend to loosen after the first few rides. This will require checking the spokes regularly until the tension stabilizes.
Photo 11
Once you do one wheel, you will really understand the process much better. Hopefully, you will find lacing wheels to be one of the most fun and rewarding parts of any restoration.


